Article below is a part of the assembly process of the UHF duplexer – main article is HERE.
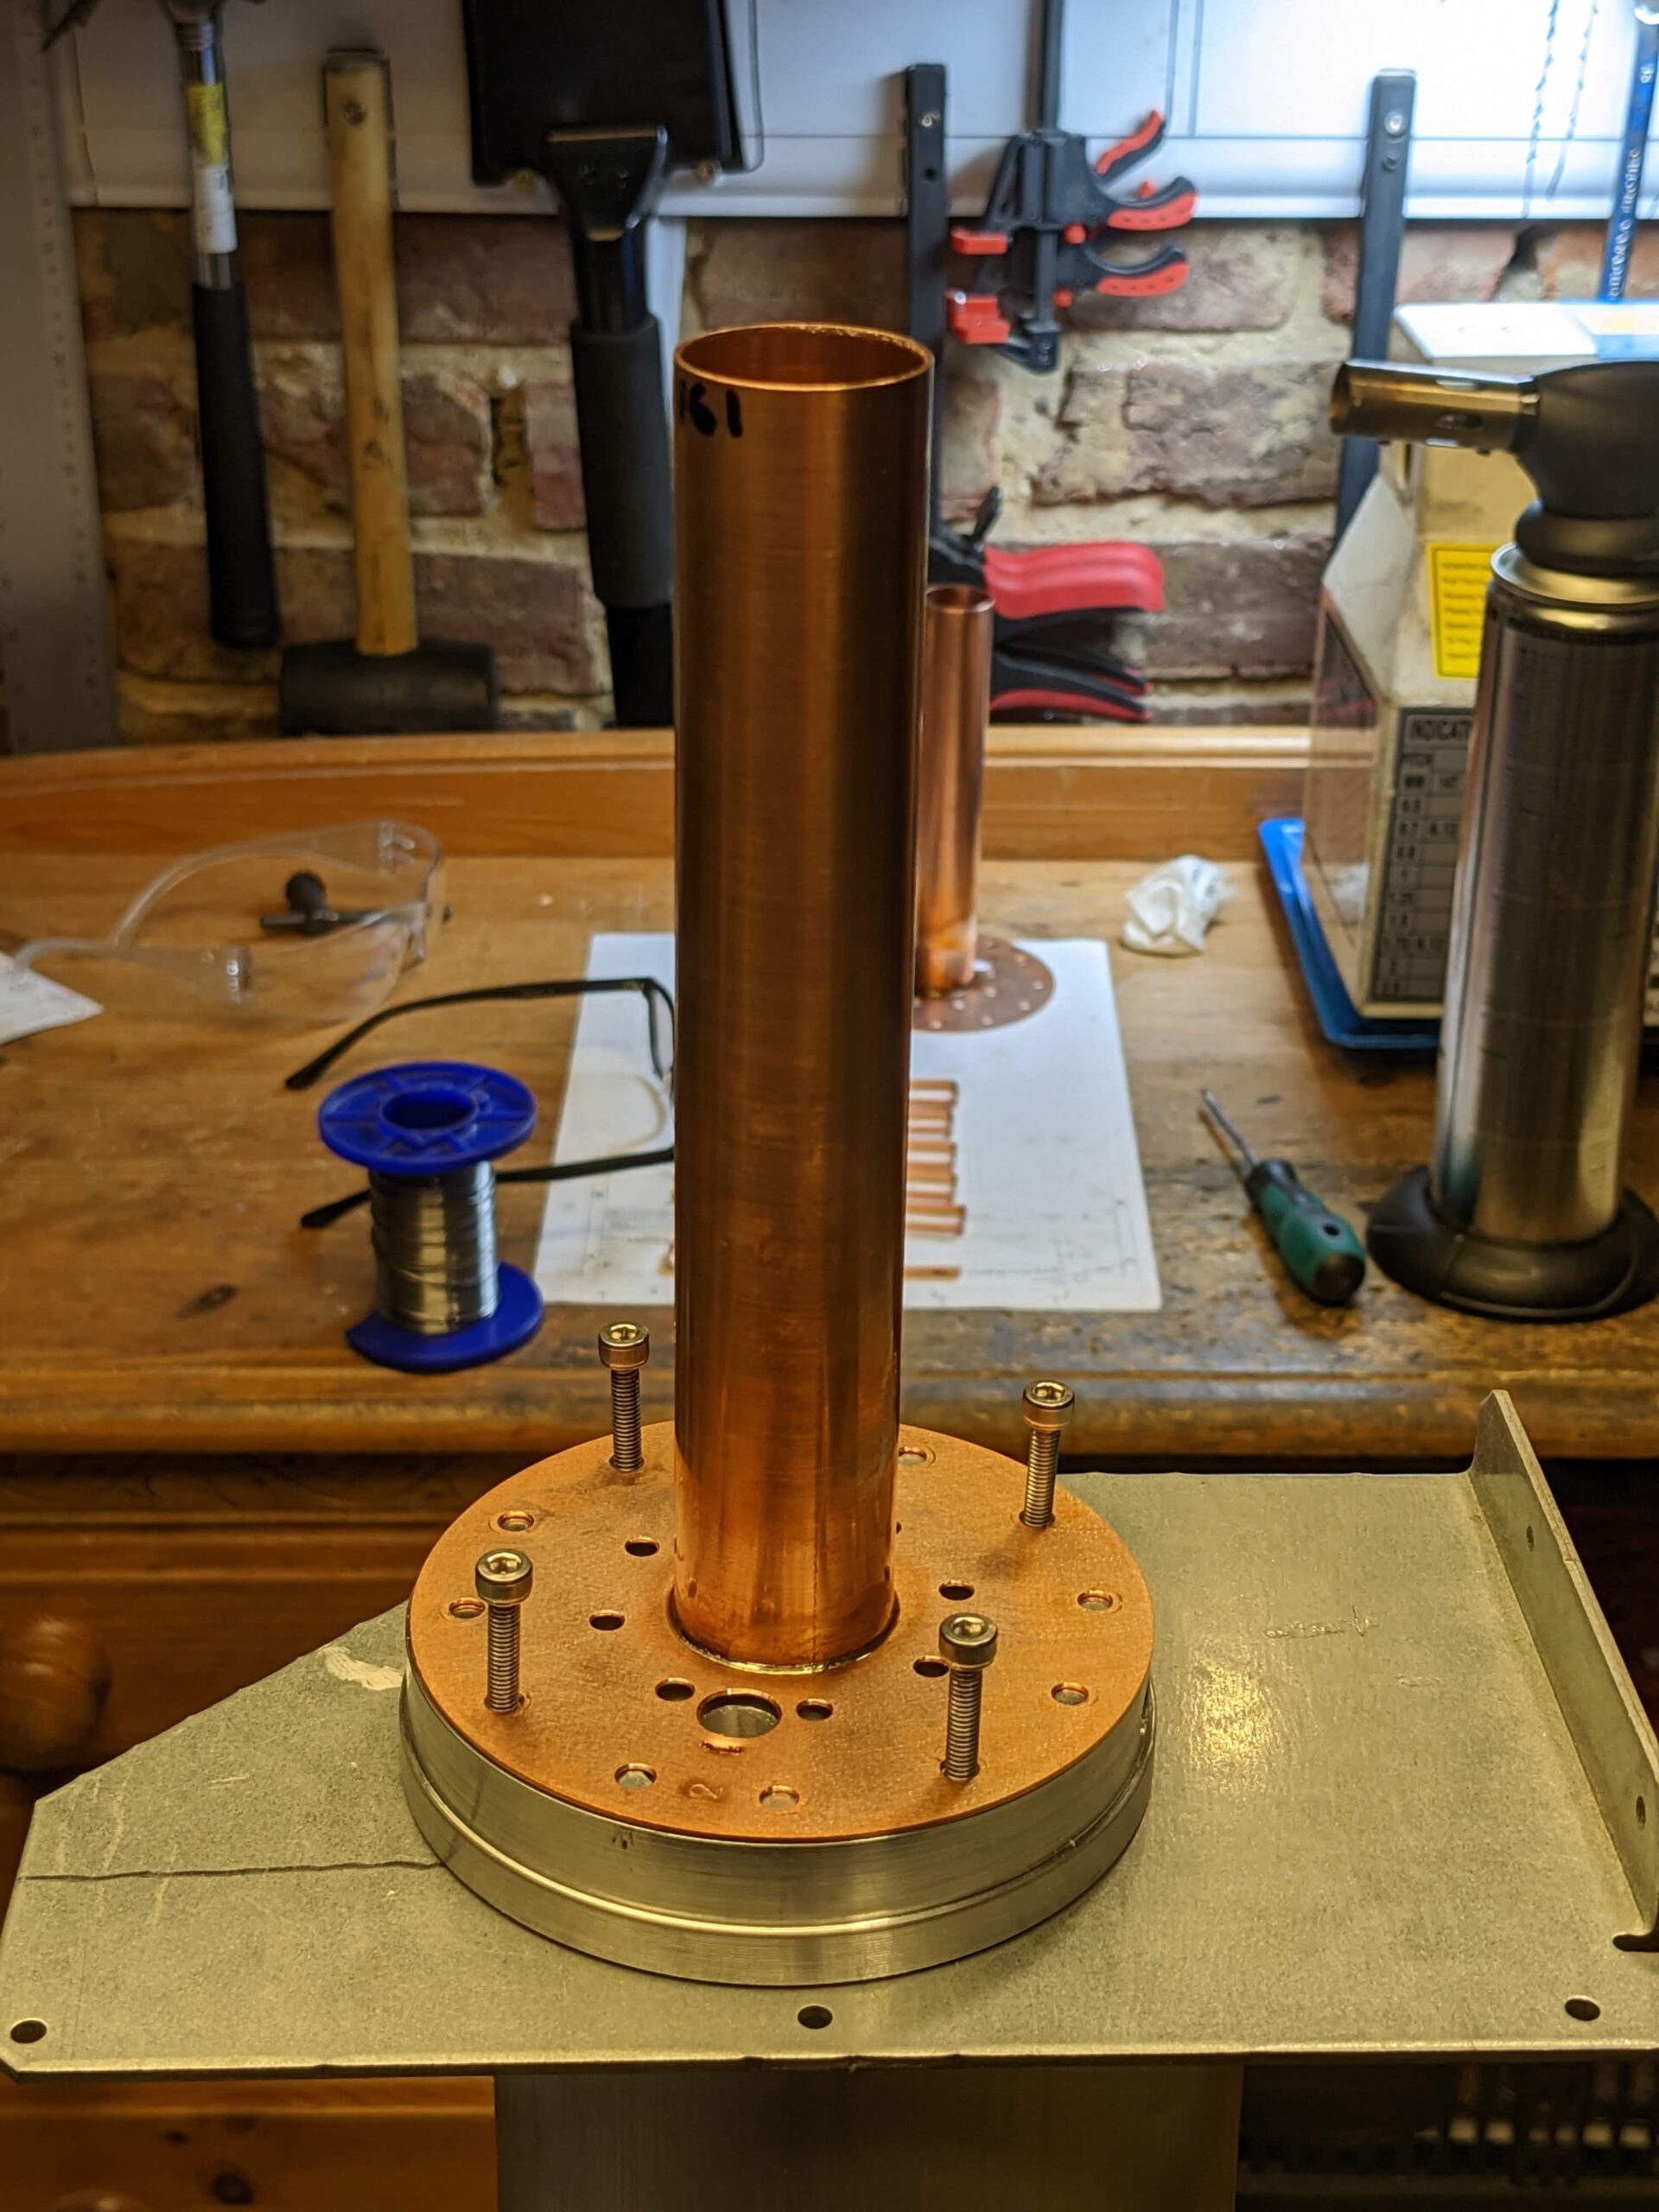
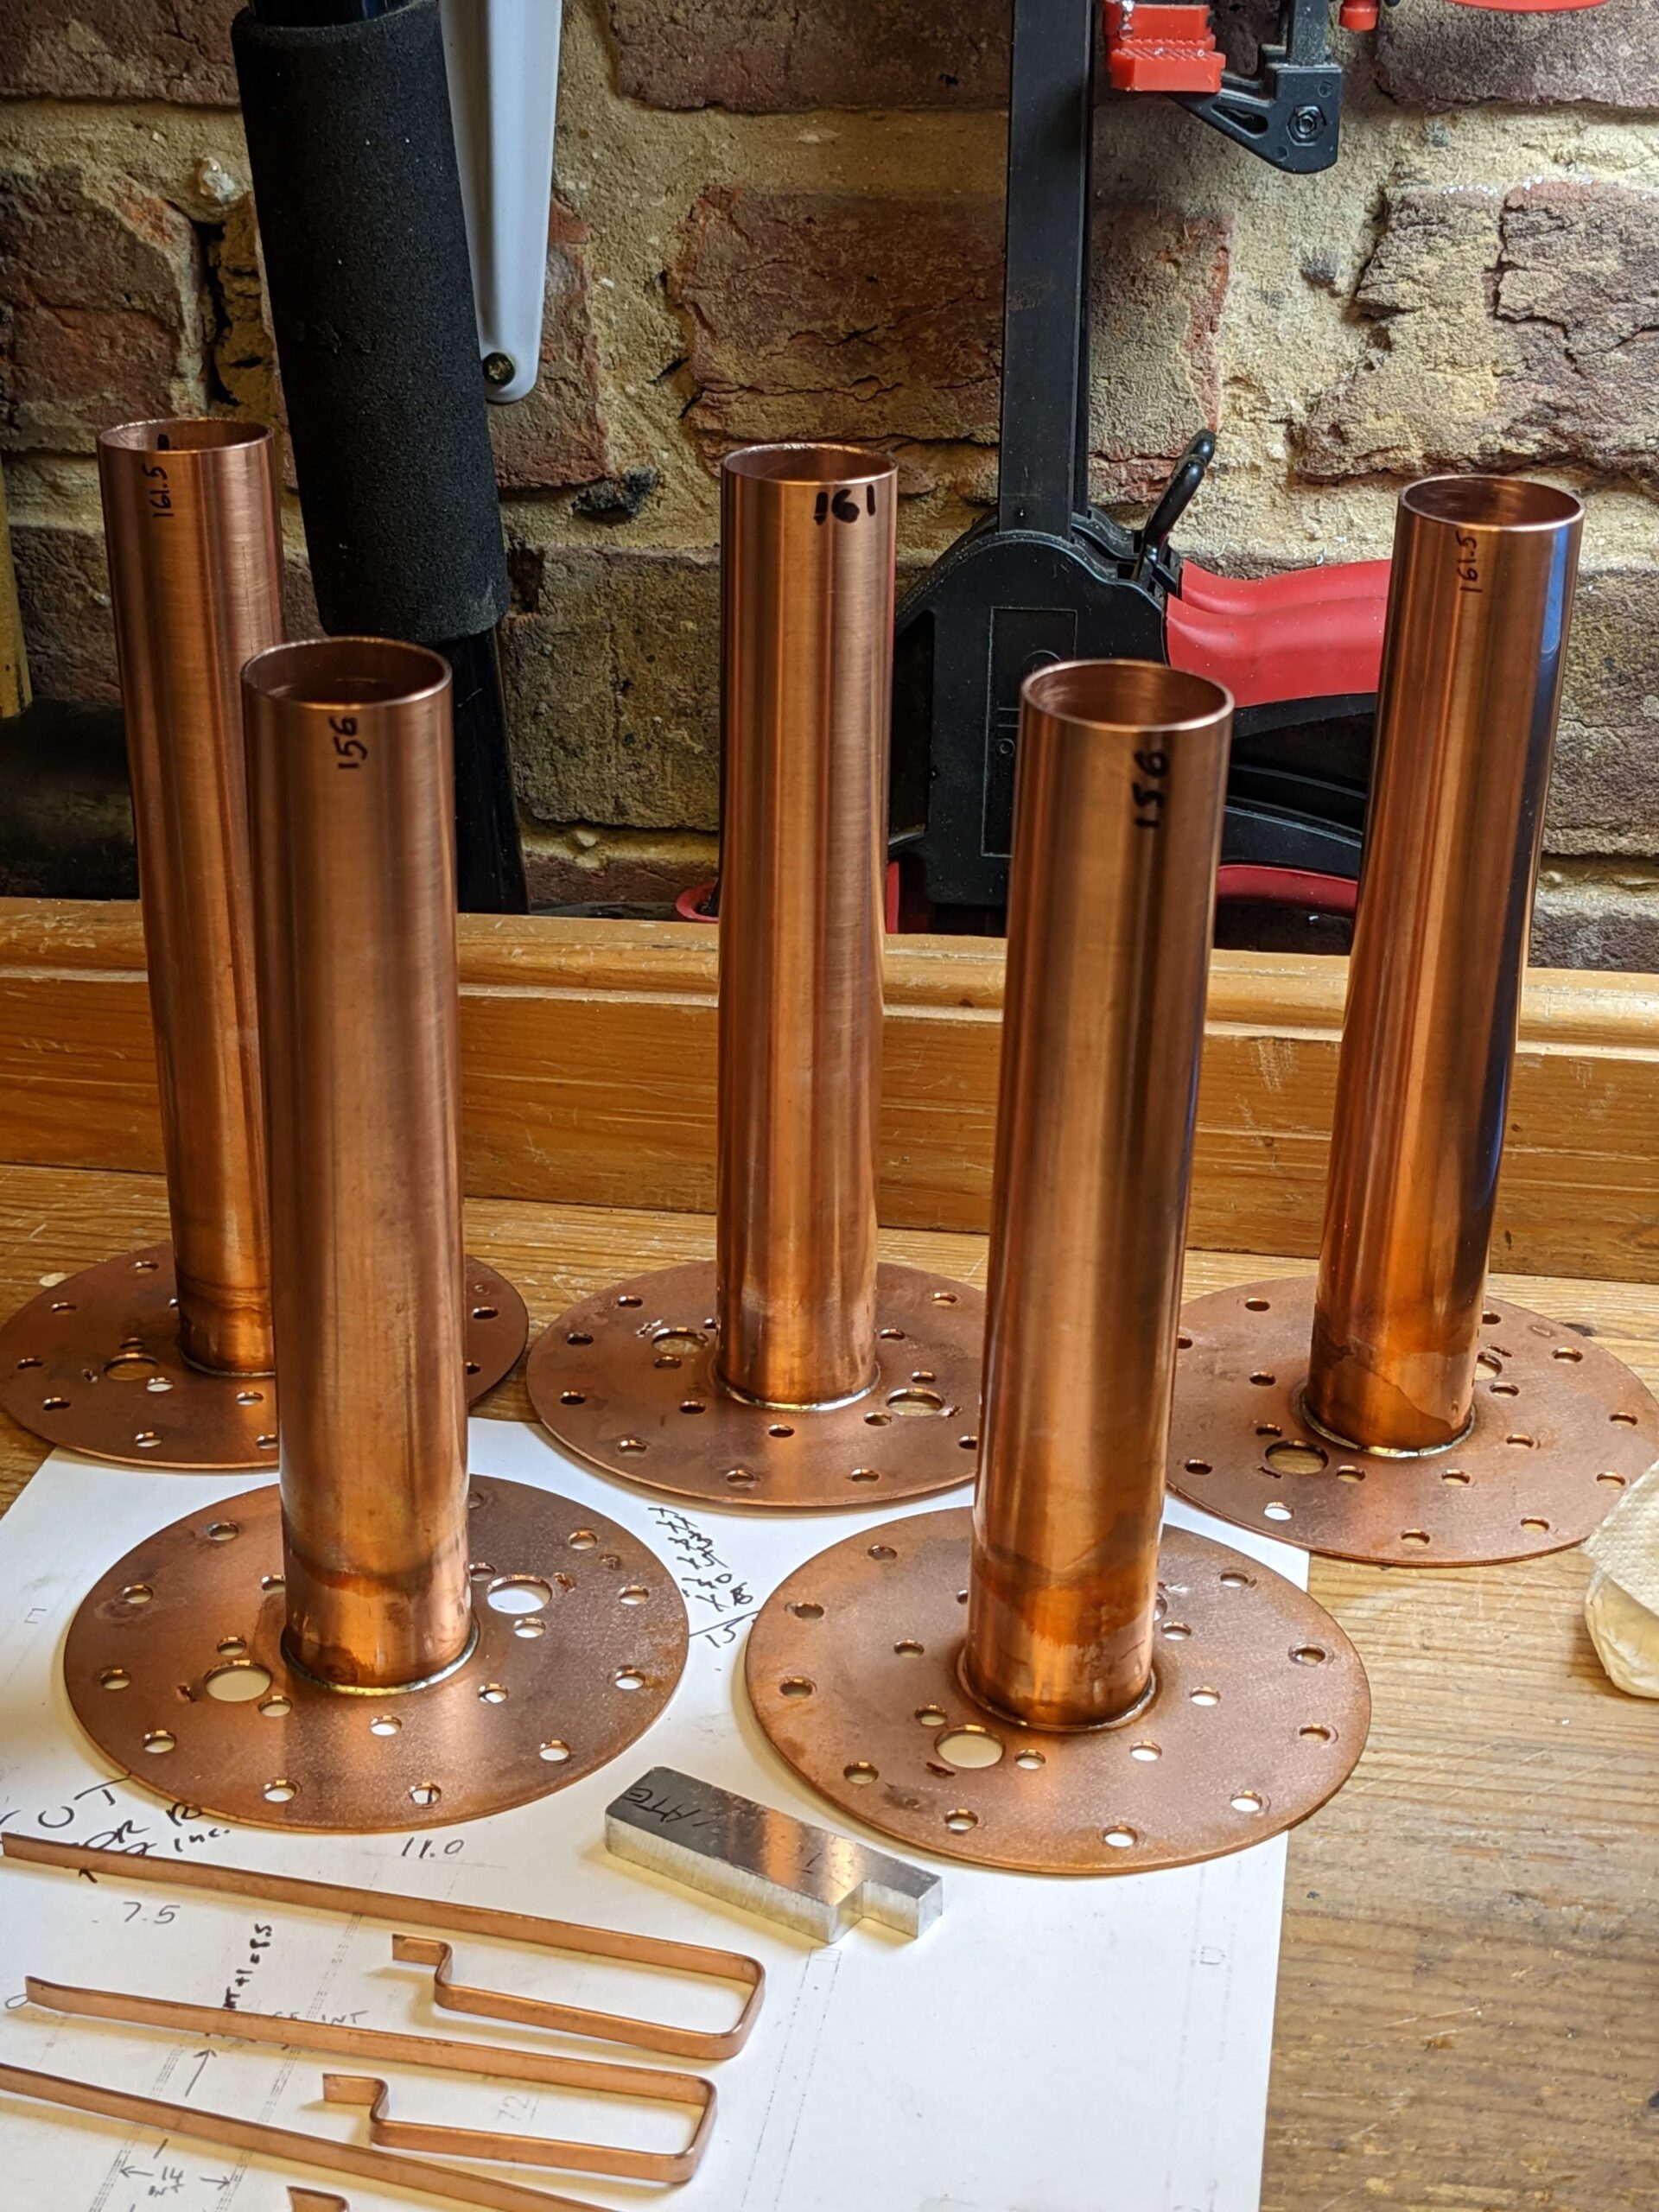
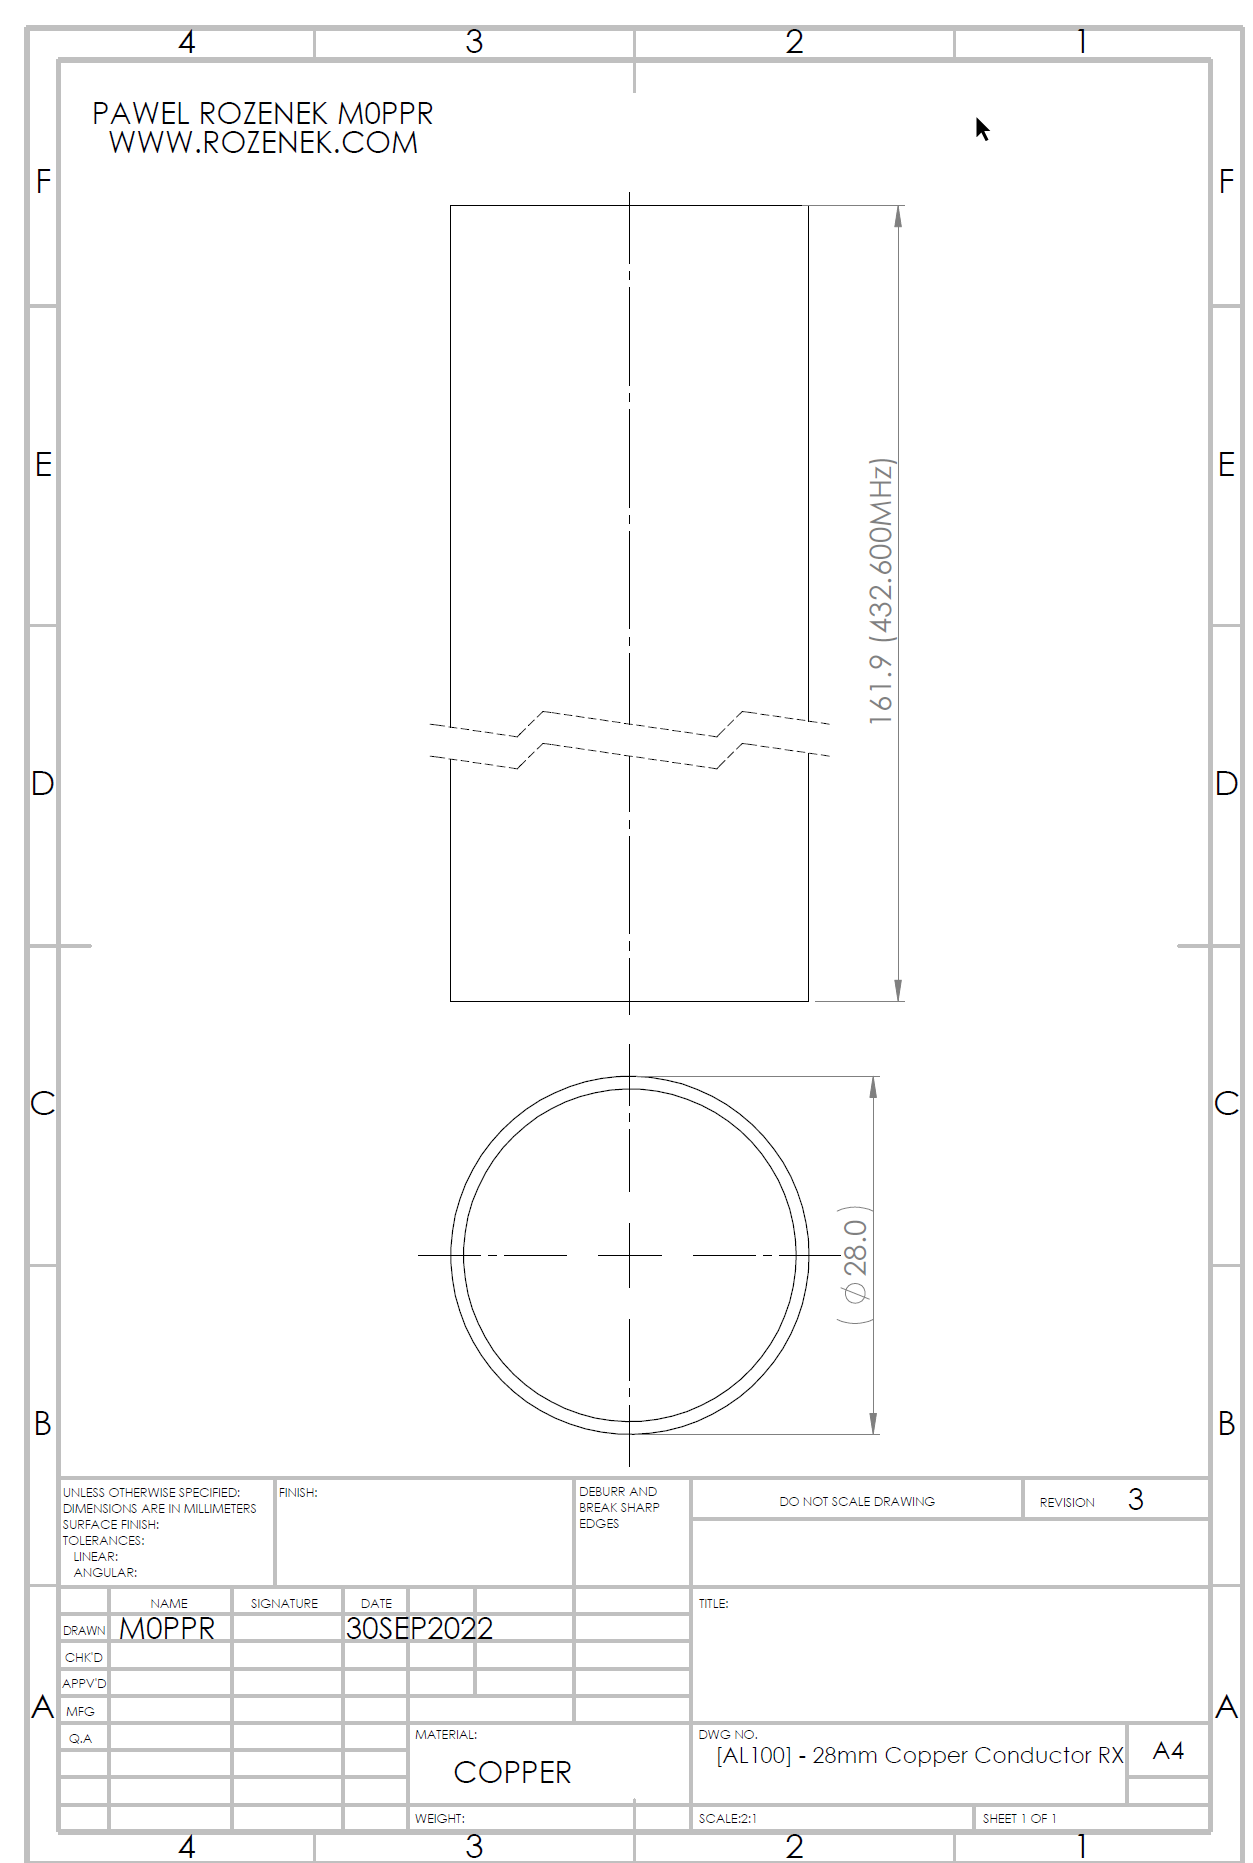
Drawing below shows a [AL100] – 28mm Copper Conductor made of copper tube cut to the correct length.
Main purpose of the part: the conductor settles a desired frequency – 163mm will set up 430.0MHz. I think the safest length is 161.5mm which will set up the frequency to roughly between 430.000MHz and 432.600MHz (this values happened in my case) – but to do not panic – the final tuning will be done by the copper rod RX at the end plate bottom side! The only one problem is when the conductor resonance frequency is too low – it means you have to chop off a bit from it.
Generally I found that every 1mm changes the resonance frequency of the duplexer cavity roughly by 2.3MHz.
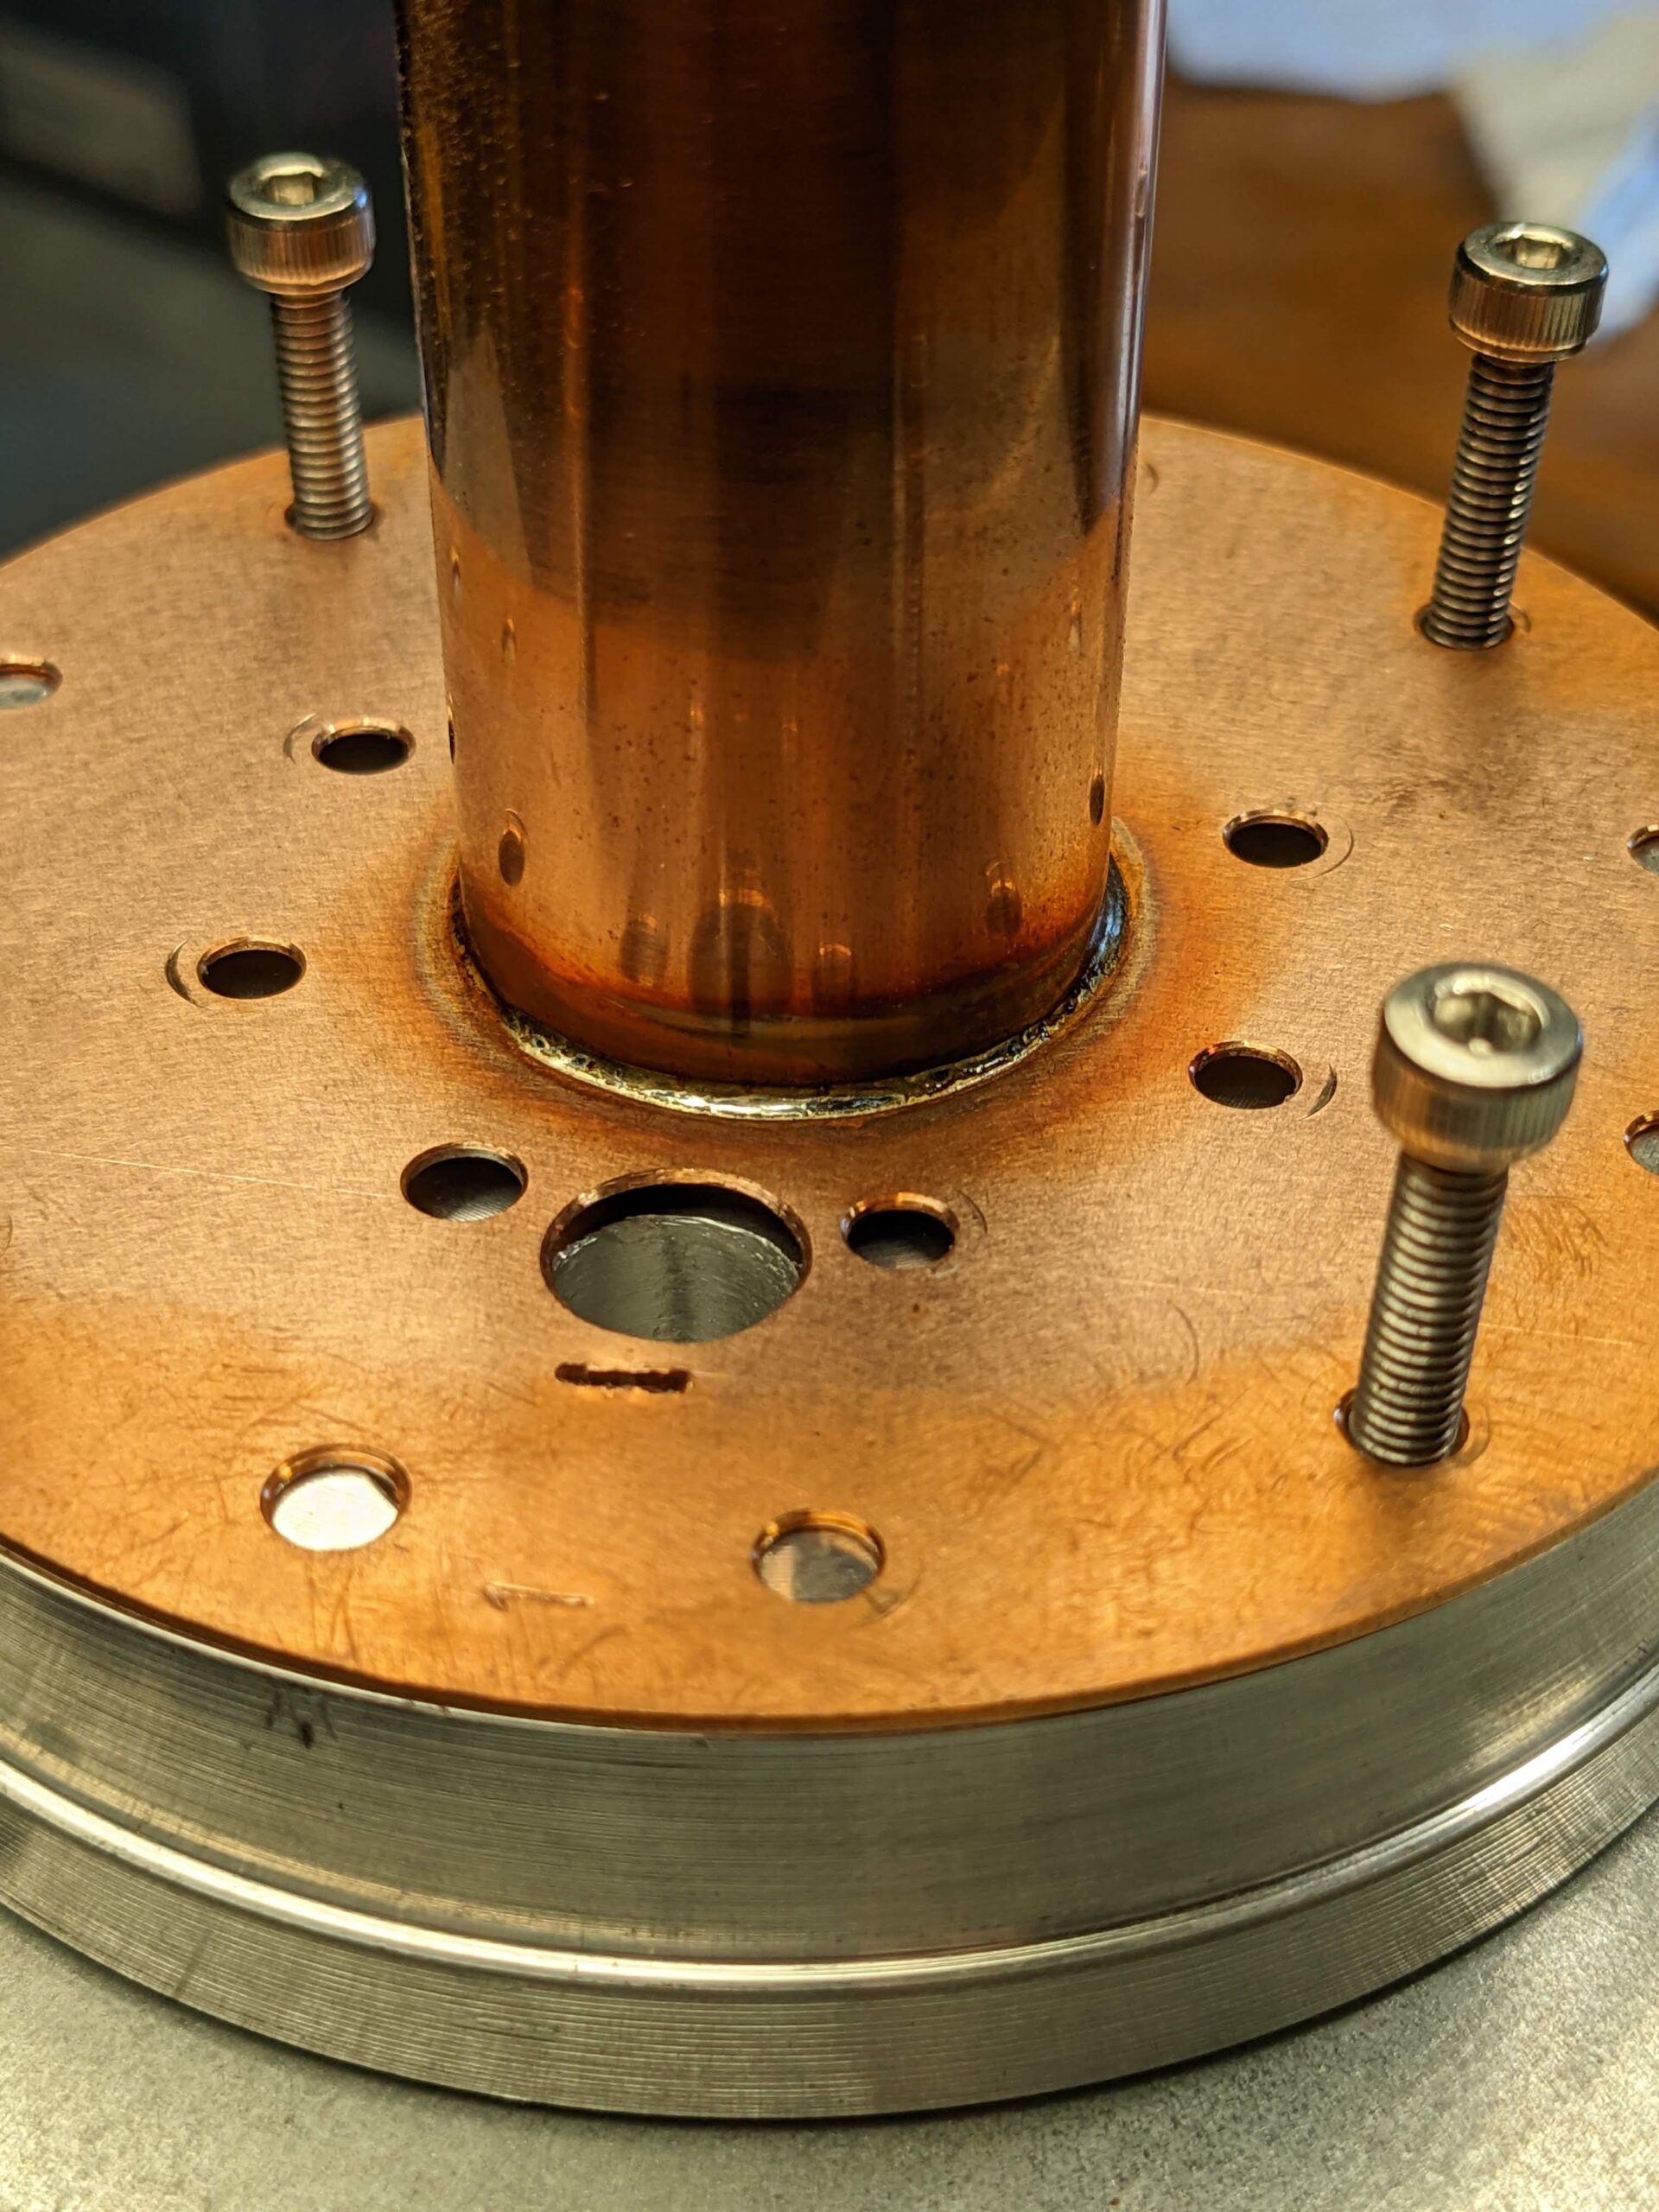
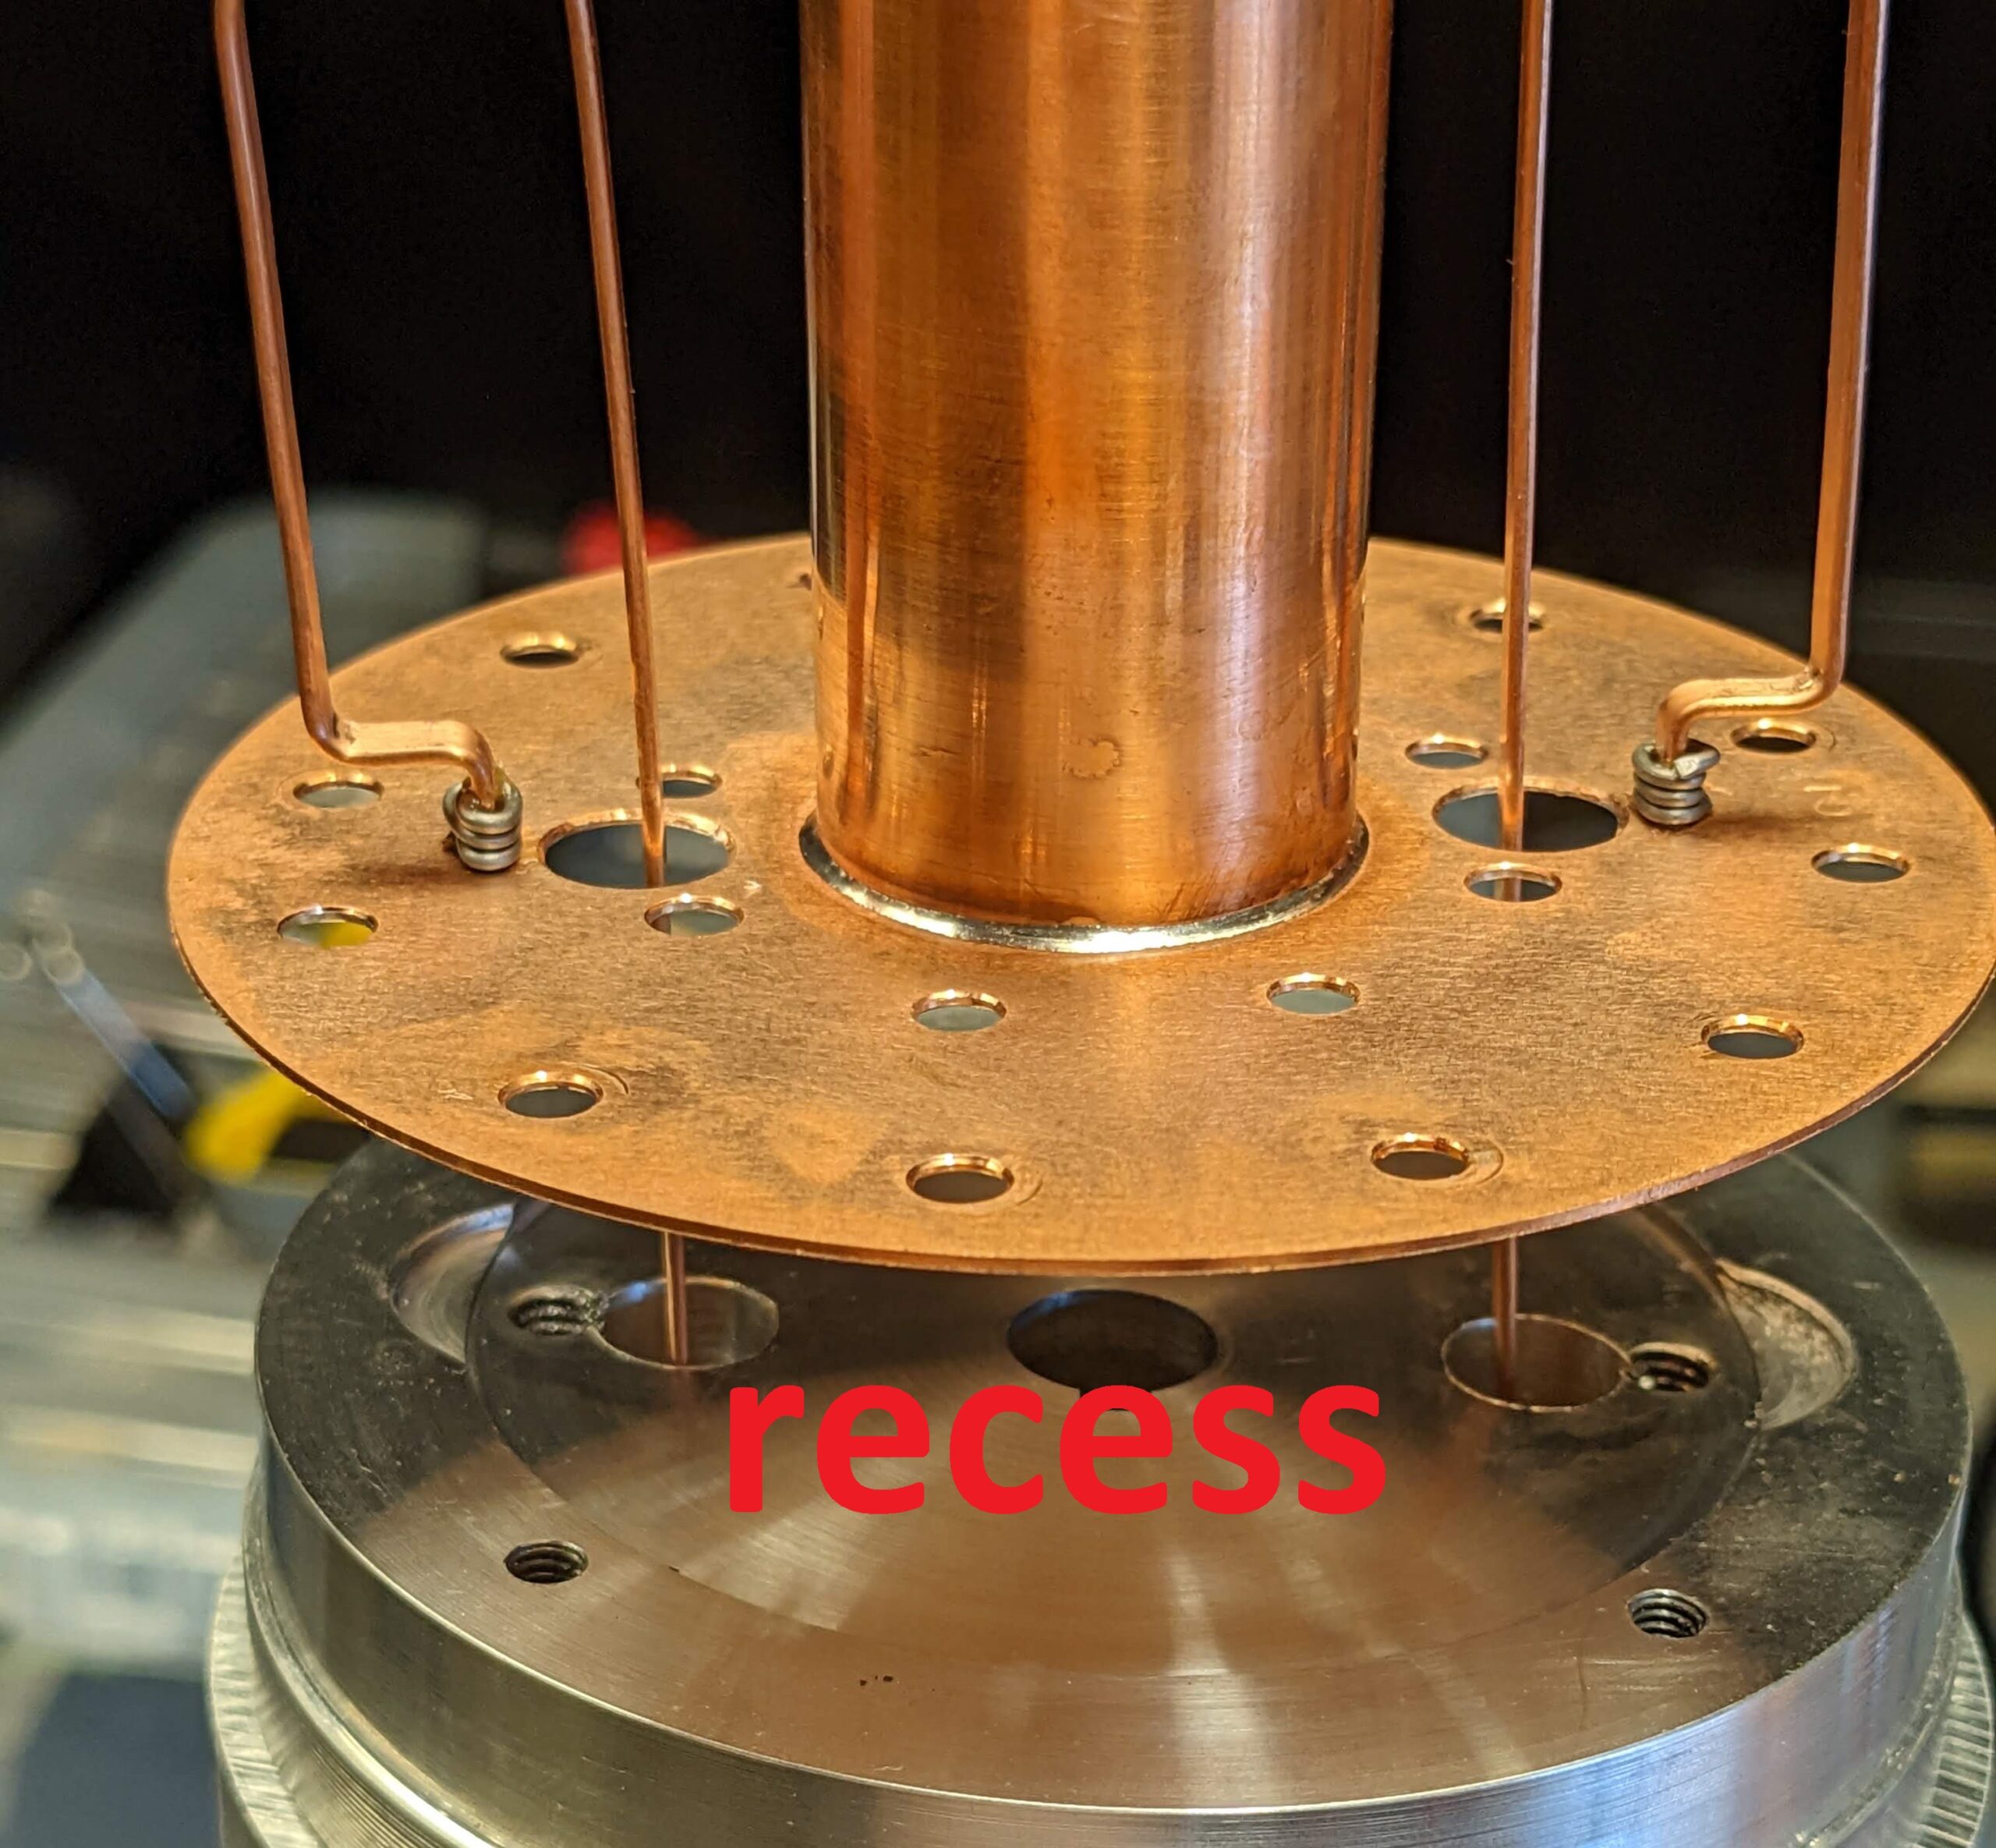
Soldering the copper conductor to the plate is achieved by using a special jig. If the plate lies on a metal surface, the heat from a gas plumbing welder will get dispersed. The jig will also help with soldering coupling loops.
Google Pixel 5 (4.38mm, f/1.73, 1/89 sec, ISO48)